The Setup Wizard
📋 In This Article
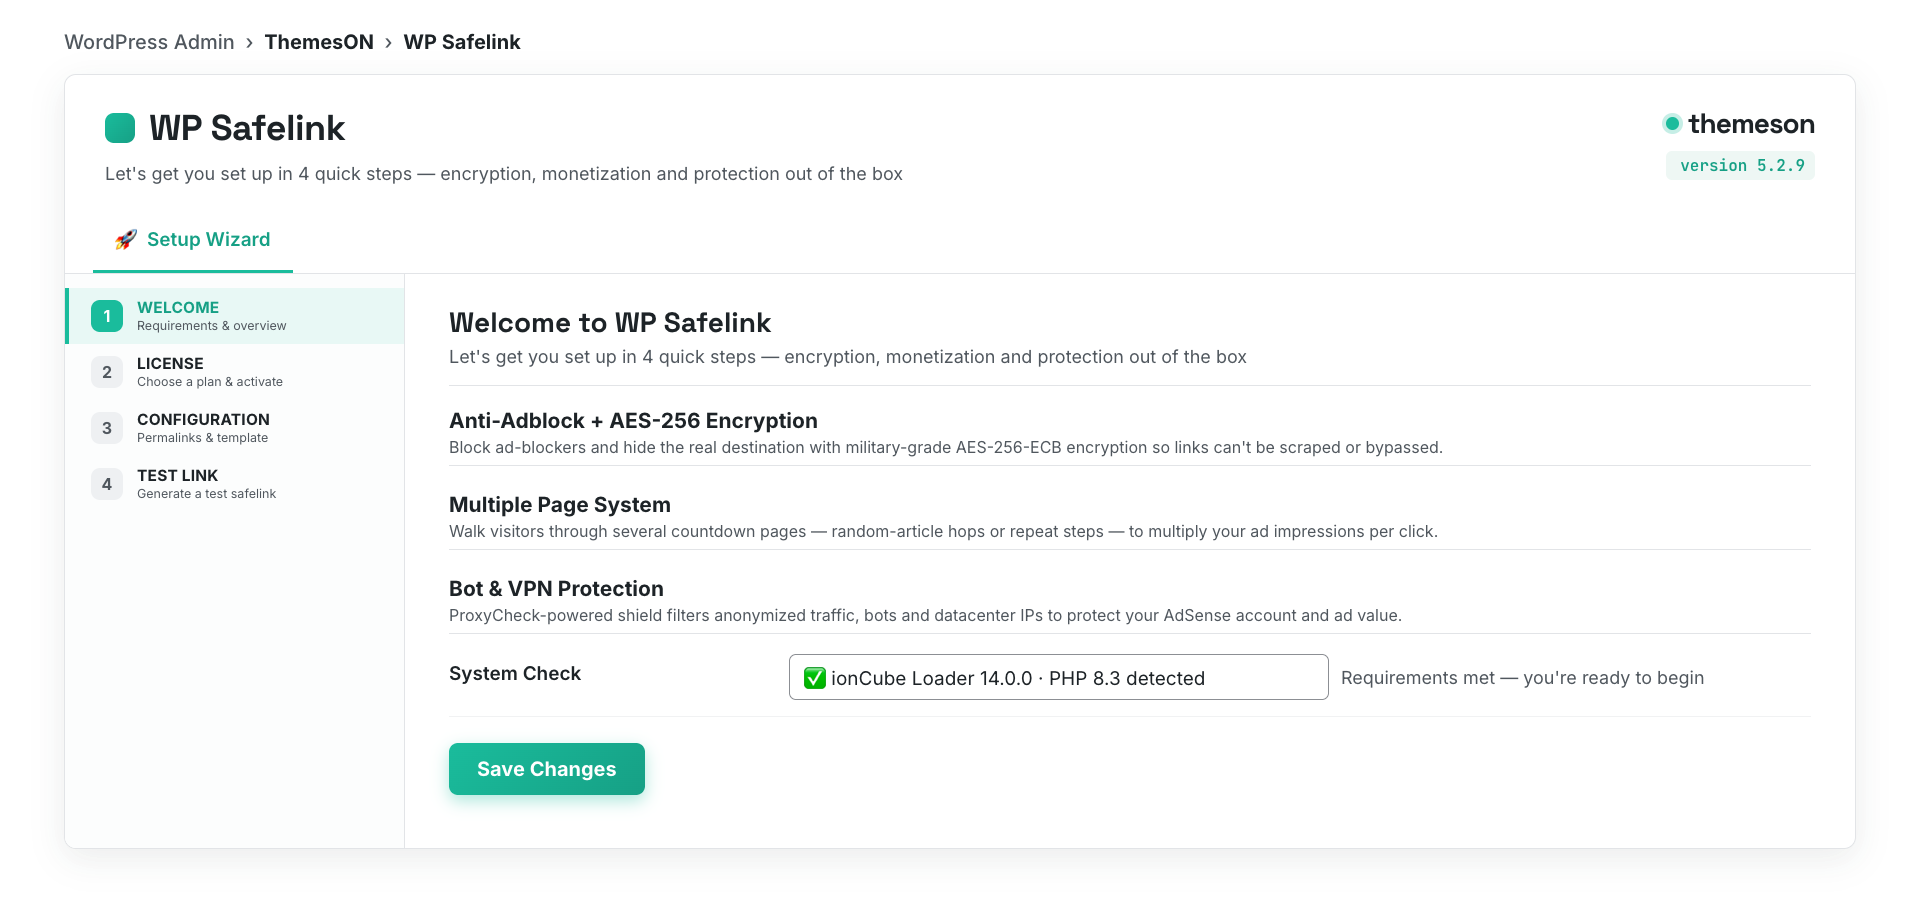
The Setup Wizard is the fastest way to get WP Safelink live. It walks you through four short steps — from a system check to your very first working safelink — so you can start monetizing without touching a single setting by hand. It opens automatically the first time you activate the plugin, and you can re-open it any time at WP Safelink → Setup.
The four steps
- Welcome — A quick intro to WP Safelink with benefit cards (Anti-Adblock + AES-256 encryption, Multiple-Page system, Bot & VPN protection). It also runs the ionCube requirement check; the Let’s Get Started button only unlocks once ionCube and PHP 8.3+ are confirmed.
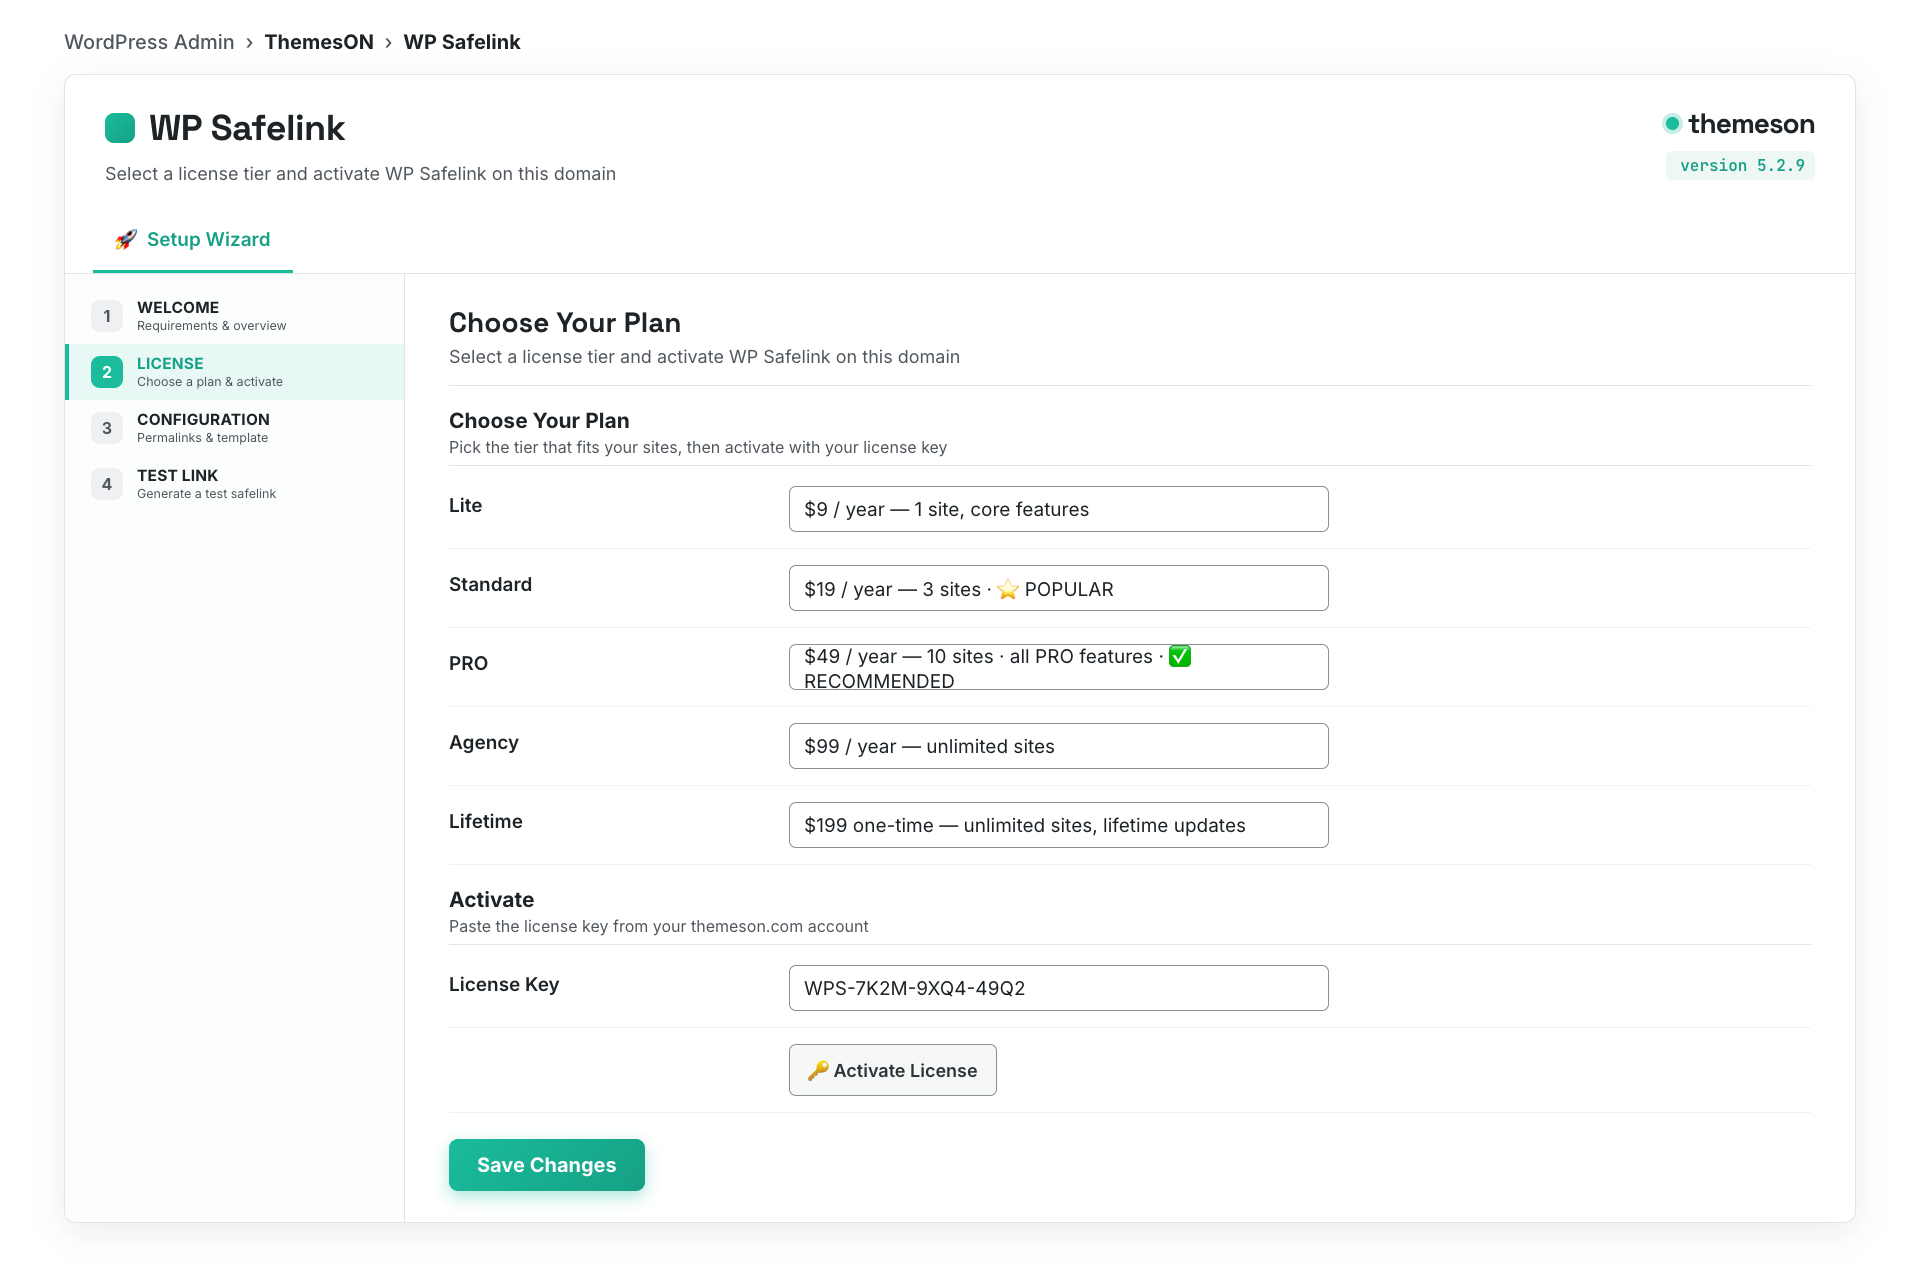
- License Activation — Choose your plan (Lite, Standard, PRO, Agency, or Lifetime) and paste your license key to activate. See Activating Your License for the details.
- Configuration — Set your URL structure (the permalink format and parameter), pick a countdown template, and toggle Auto Integration so safelinks display inside your theme automatically.
- Test Link — Paste any URL, click Generate, and copy/test your first real safelink before you finish. When it works, click Complete Setup.
Step 1: Welcome
Step 2: License Activation
What the wizard sets up for you
| Step | What you decide | Default / recommendation |
|---|---|---|
| Welcome | Confirm server requirements | Must pass before continuing |
| License | Plan + license key | PRO recommended for full features |
| Configuration | URL structure, template, Auto Integration | Permalink Path style, Installed Theme template, Auto Integration on |
| Test Link | Generate & verify a sample safelink | Test before completing |
💡 Note: Finishing the wizard saves a sensible default configuration so safelinks work right away. You can fine-tune everything later under WP Safelink → Settings (General, Templates, Integration, and the PRO tabs). When you’re done here, head to Creating Your First Safelink.
Was this article helpful?